
SciLifeLab Data Repository Submission Guidelines
The following guidelines include information on how to upload and publish files on the SciLifeLab Data repository. The guidelines also explains how to fill out metadata for the files and how to use the different functionalities that the system offers.
Before starting a submission, make sure that it adheres to the purpose of the service and the conditions of use.
Table of contents
- Step 1. Create an item
- Step 2. Define submission type
- Step 3. Add item information (metadata)
- Step 4. Item actions
- Step 5. Publish items
- Step 6. Modify items
- Frequently Asked Questions
Step 1. Create an item
Once logged into your account, click on My content and choose Items from the drop down menu. From there click on the Create new button on the top left.
Step 2. Define submission type
Depending on your needs, you can choose to create an item with or without files. The most common type of submissions include uploaded files. However, if the files contain personal data, or if they are available elsewhere, you may choose to create an item without files.
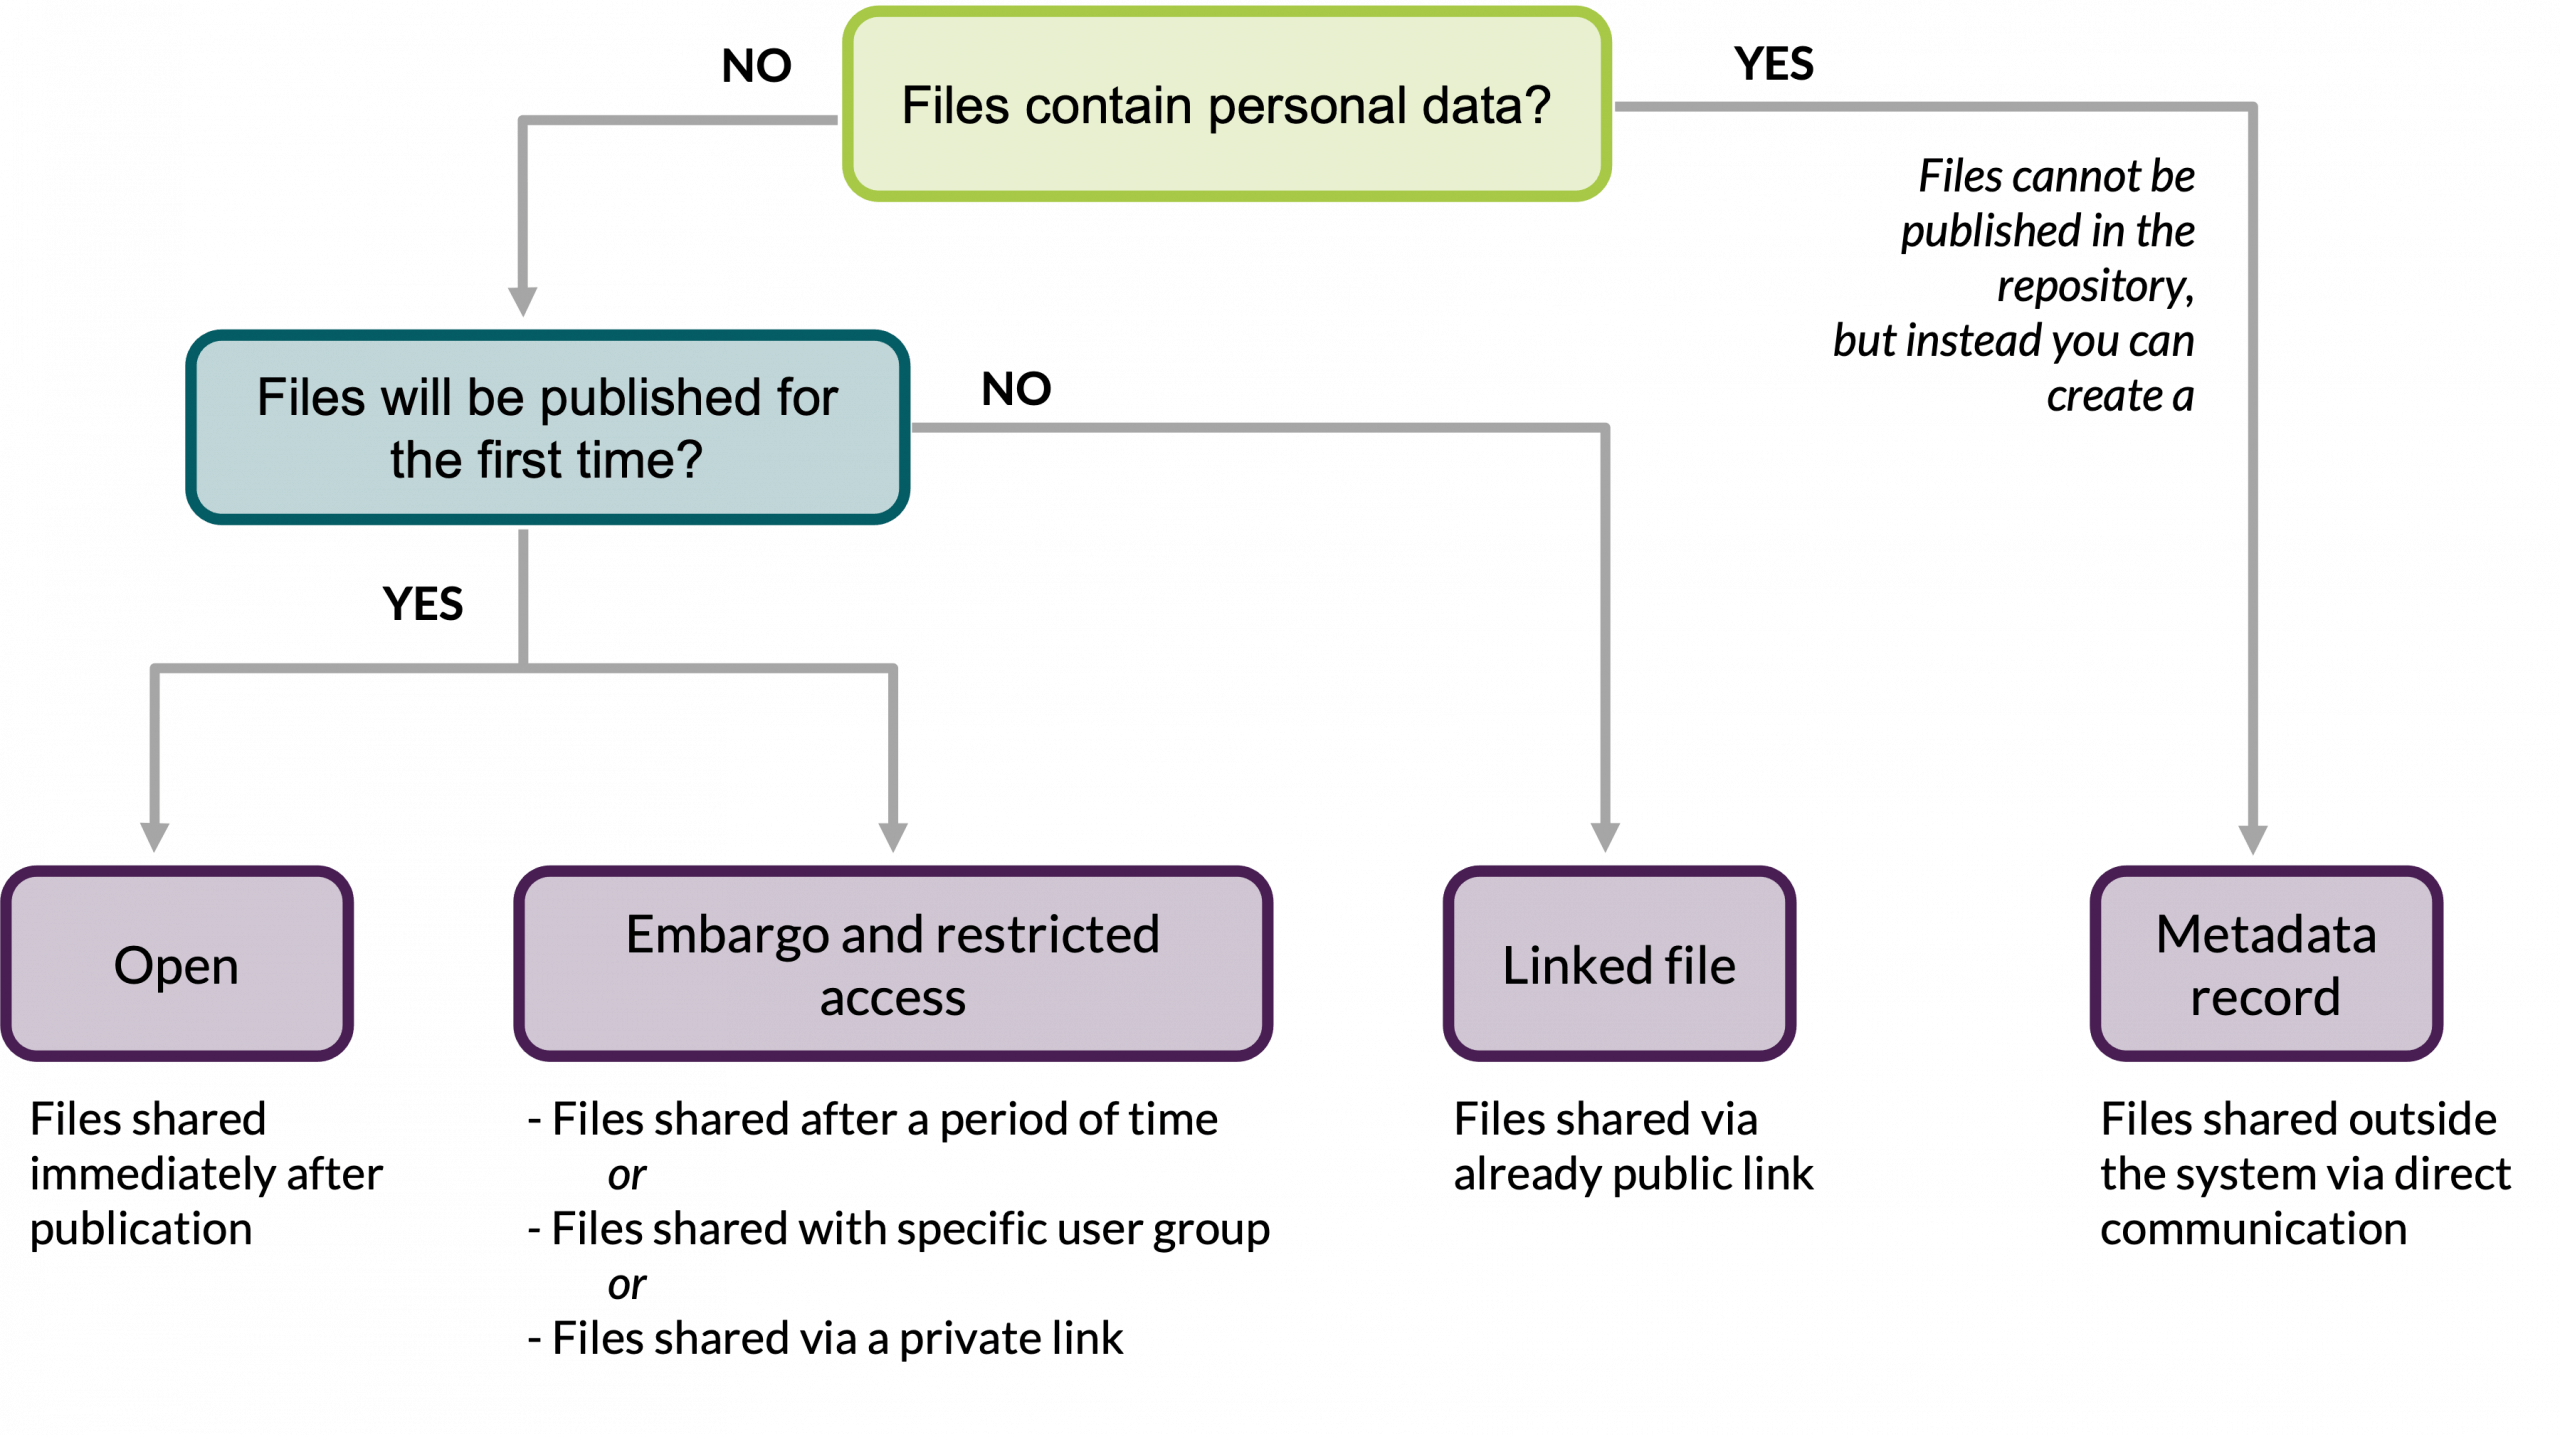
Publishing options of the SciLifeLab Data Repository.
Item with files
For an item with files, you can choose to publish the files openly, under embargo or under restricted access.
How to upload files
There are several ways to upload files:
- Using the web browser, you can directly drag and drop files and/or folders. Please note: most web browsers only can cope with single file uploads of up to 5 GB.
- Using the FTP uploader. For more on uploading using the FTP uploader see here.
- Using the Figshare API. For documentation on using Figshare API, see here. For a quick start, see our GitHub repository with example scripts on interacting with the SciLifeLab Data Repository using API. Note that you should use the same base URL as for Figshare in general; based on the personal token that you generate in the SciLifeLab Data Repository, the item will be published in our repository.
Readme and Manifest files
Please include both a README file and a manifest file with the item. These files can be created in plain text or in markdown format. Adding a README and a manifest file will improve accessibility for those downloading the item. The README file should preferably contain the same metadata as is filled out during submission, including the reserved DOI of the item. The manifest file should contain a list of every data file included in the item and their approximate size in bytes. You do not need to include the manifest file itself in the listing, but the README file should be included. Please provide the README and manifest files separately and directly (not within compressed archives). This ensures they are easily accessible for review, enhancing the item’s discoverability and usability. When uploading a file to the SciLifeLab Data Repository, a MD5 checksum for the file is automatically generated. Click on the Preview item link on the right-hand side options, which will display a new window, and click on the information icon to view the files checksum.
Item without files
There are two options for items without files, metadata record and linked file item. These two options will only appear if you have not uploaded a file to the item. README and manifest files cannot be added to items without files as no files can be uploaded. However, in line with good data management practice, it is encouraged to keep a README and a manifest file locally or elsewhere together with the data.
Metadata record
If you cannot share the files openly, you may want to publish a metadata record. The metadata record differs from items with files in some aspects:
- The licence should always be “Restricted access”.
- A access request email has to be filled out as described in section Access request email.
To create a metadata record, click the Set as metadata record box at the top of the screen and enter a reason for this choice.
Linked file item
This option is useful for files available elsewhere. Click the Link to external files box at the top of the screen and copy the link in the box to create a linked file item.
Step 3. Add item information (metadata)
When creating an item you will be asked to fill out metadata for the item. The metadata includes both mandatory and non-mandatory fields. The purpose of filling out the metadata thoroughly is to maximise the reusability of the item. Once an item is published on the SciLifeLab Data Repository, it should be self-explanatory. The SciLifeLab Data Repository should be used as a catch-all space, i.e. everything that is connected to the submitted item should also be submitted to or linked to here.
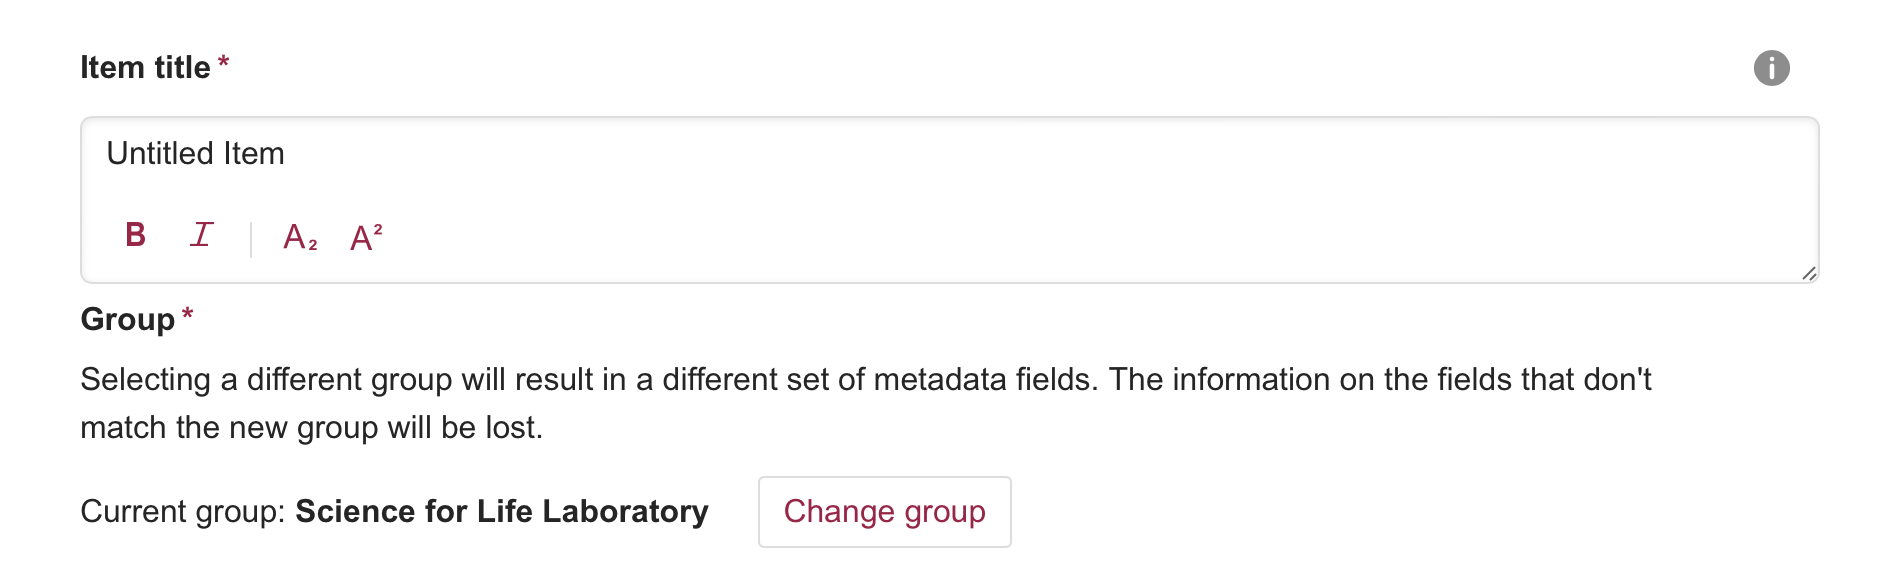
Item title
This is a mandatory field where a title for the submitted item should be entered. Strive for an informative, concise title with a clear scientific meaning that is understandable to someone without prior knowledge of the project. To maximize discoverability, avoid using underscores and bold formatting in the title.
Group
This is a mandatory field where a group is chosen for the item. The purpose of this field is to connect the item with the correct research group, SciLifeLab platform or unit where applicable. If there are no group preferences, choose the repository main group “Science For Life Laboratory”. Each group receives its own URL. This URL can then be referenced from the research group, platform or units own web page. The submitter can contact the SciLifeLab Data Centre figshare@scilifelab.se in order to suggest the creation of a new group.
Item type
This is a mandatory field where the submitter can select what kind of item is being submitted.
The following item types can be uploaded to the SciLifeLab Data Repository:
- Book. Books are generally long-form documents, a specialist work of writing that contains multiple chapters or a detailed written study.
- Conference Contribution. Any type of content contributed to an academic conference, such as papers, presentations, lectures or proceedings.
- Data management plan. Data management plans are an integral part of a research venture, describing what data will be collected or created and how, and also the means by which it will be shared and preserved.
- Dataset. Datasets usually provide raw data for analysis. This raw data often comes in spreadsheet form, but can be any collection of data, on which analysis can be performed.
- Educational resource. Any type of content useful for teaching, learning or research in an educational context.
- Figure. Figures are generally photos, graphs and static images that would be represented in traditional pdf publications.
- Journal Contribution. Any type of content formally published in an academic journal, usually following a peer-review process.
- Media. Media is any form of research output that is recorded and played. This is most commonly video, but can be audio or 3D representations.
- Model. A formal representation of any system, entity, phenomenon or structure useful in the research endeavour.
- Online Resource. Any type of resource available online.
- Peer review. The evaluation of a scholarly work, usually performed before formal publication by a number of field experts.
- Poster. Poster sessions are particularly prominent at academic conferences. Posters are usually one frame of a Powerpoint (or similar) presentation and are represented at full resolution to make it possible to zoom in.
- Preprint. Preprints are manuscripts made publicly available before they have been submitted for formal peer review and publication. They might contain new research findings or data. Preprints can be a draft or final version of an author’s research but must not have been accepted for publication at the time of submission.
- Presentation. Academic presentations can be uploaded in their original slide format. Presentations are usually represented as slide decks. Videos of presentations can be uploaded as media.
- Registration. Description of a research project, including, for example, the hypotheses, data collection plans, or scripts, provided before any actual experiment or analysis is performed.
- Software. Code as a research output can either be uploaded directly from your computer or through the code management system GitHub. Versioning of code repositories is supported.
- Thesis. In order to distinguish essays and pre-prints from academic theses, we have a separate category. These are often much longer text-based documents than a paper.
- Workflow. Resource describing protocols, procedures, methods or activities part of a scientific experiment.
When uploading a presentation, poster or a preprint, make sure that you have permission to upload all that is included in the item, for example figures.
Authors
This is a mandatory field where the submitter can add the authors of the item. Every person that has been involved in the creation of the item should be added here; adding all of the authors makes the item more findable. When uploading on behalf of someone else, the submitter can remove themselves as an author.
It is recommended that you connect your ORCID to your account so it is visible on your author profile.
Categories
This is a mandatory field where a discipline category is chosen for the item. The list of categories is fixed and based on the Australian and New Zealand Standard Research Classification (ANZSRC) Fields of Research (FOR) codes. Choose all categories that apply for the item. The list of categories is not specific for the field of life science which sometimes can make it difficult to find a correct category. However, remember that the keywords can be used to increase specificity in those cases.
Keywords
This is a mandatory field where the submitter can add keywords to the item. The keywords can be more specific than the categories and should be used as a means to make the item more findable. Facilities submitting an item are encouraged to include the name of the facility as a keyword. There is no upper limit of the number of keywords, but remember to keep the keywords accurate and relevant. In order to increase interoperability of the item the keywords should be written in a formal, accessible, shared and broadly applicable language for knowledge representation.
It is a free-text field and so special attention should be paid to the correct spelling of keywords. Misspelling keywords will decrease the findability of the item. Searches based on keywords are not case sensitive.
When writing an abbreviation, make sure that the full name is added in the description part of the item.
Description
This is a mandatory, free-text field where a description of the item can be added. Ideally, the item should be self-contained and a user should be able to enter the item directly and find all of the information required to be able to understand and/or use the content e.g. reuse the data. For someone interested in the item it can be informative to know the purpose of the item, e.g. why was it generated/produced. In this field, information about specific software needed to open a file and the version of the software used by the submitters should be stated, along with a URL or persistent identifier (PID) to this software.
For the item type dataset it should be clear how the data were obtained and what data each file contains. State who generated or collected the data and, if possible, specify the date this was done. Specify whether the data is raw or processed. In case of processed data, describe how it has been processed.
Funding
This is a non-mandatory field that can be used to add funding information related to the materials in this item. One or several funders and/or grant numbers can be added. When typing a grant number the system will automatically search the Dimensions database for the grant. If the information is found, a hyperlink will be generated to the Dimensions page.
Related materials
This is a non-mandatory field where materials related to the item can be listed (e.g. DOI of the associated manuscript). For each related material added, the following information can be stated:
- Identifier (mandatory)
- Title (non-mandatory)
- Identifier type (mandatory)
- Relation type (mandatory)
For each related material the submitter can also choose for it to show as a separate “call-out” box by ticking Show in linkout area.
Licence
This is a mandatory field where a licence for the item is stated. A licence normally limits how the item can be reused and altered, in what context it can be used and how the creator should be credited. It is recommended that the licence selected be as open as possible. The appropriate licence can sometimes be specified by the funder, the publisher or institutional policies.
Available licences:
- CC0
- CC BY 4.0
- CC BY-SA 4.0
- CC BY-NC-SA 4.0
- CC BY-NC-ND 4.0
- MIT
- GPL
- GPL 2.0 +
- GPL 3.0 +
- Apache 2.0
- BSD-3-Clause
- Restricted Access
If you require another licence, please send a message to figshare@scilifelab.se.
For metadata records, select the restricted access licence.
Publisher
This is a mandatory field where the submitter should state a publisher. The publisher can be, for instance, the research principal (forskningshuvudman) or the university, the institute or the unit with which the submitter is affiliated.
Contact email
This is a mandatory field that should be filled with the email address of the person to whom questions about the item should be directed.
Access request email (applies only for metadata records)
When uploading a metadata record, the submitter should fill out the access request email field to specify where file requests could be sent. If the built in request access functionality is being used, this field should not be filled out.
For items other than metadata records, this field should be left empty.
SciLifeLab acknowledgement
This is a non-mandatory field in which the submitter can acknowledge the involvement of a SciLifeLab platform, infrastructure unit, or central function (e.g. Data Centre, Training Hub). The submitter can select relevant option(s) from the drop-down menu. Please contact SciLifeLab Data Centre in order to request additions to the options in the list.
The purpose of this field is to give credit to platforms, units, and/or functions that were involved in the work. It is not intended as a general acknowledgements section, as one might exact in a traditional publication. Any individuals involved in the work should instead be given credit by being listed in the “Authors” field.
Step 4. Item actions
Add embargo and restricted access
To use this functionality, click on Add embargo and restricted access. You can select a time period for the embargo or, select permanent embargo, where restrictions to the underlying files will apply. It is not necessary to apply the embargo to the entire item. Indeed, you can choose whether the embargo applies only to the files or to the entire content (files and metadata). You can then choose who can access the embargoed content (i.e. before the embargo period expires). By choosing Nobody, you ensure that nobody will have access to the embargoed content until the embargo period expires. Choosing Custom instead enables you to select, for example, whether access should be restricted to all users of the SciLifeLab Data Repository when they are logged in.
The item owner can also change the title of the embargo to describe the type of embargo applied (the standard text is “File(s) under embargo”) and can optionally add a reason as to why this item is under an embargo.
It is also possible to allow users to request access to embargoed files. Note though that this functionality is not available for metadata records. To enable the functionality, tick the Allow anybody to request access to the embargoed files box. You can include additional information as a message for anyone requesting access to the files. When this functionality is enabled, a button with the text “Request access to files” will appear on the published item. Anyone looking to request access needs to be a user of a Figshare instance. When users click on this button, they will see the added message (data access statement) and can choose to send an access request. If a user requests access to the restricted files through this feature, you and the institutional administrators will receive an email request to grant access. There is currently no way to share restricted access files with a user in the interface, this has to be done using an external service.
Share with private link
Click on Share with private link to create a link that you can share. As the private link will expire in the future it should not be used for referencing purposes.
To find the private link for an item in a project, click on the item and then click on Share. However, this is only possible after the item owner has generated the private link.
The private link should not be used to cite the item in publications.
Manage Identifiers
Click on Manage persistent identifiers to manage the persistent identifier (PID) for the item. Here you get the possibility to reserve a Digital Object Identifier (DOI). The reserved DOI is the base DOI, which will always point to the latest public version on the item. Once the item is published, the reserved DOI becomes active and the base DOI will get the suffix “.v1”. The reserved DOI can be used to cite the item in publications.
Add custom thumbnail
Click on Add custom thumbnail to select a custom image for the item’s thumbnail preview shown on the public side.
Step 5. Publish items
Before you send the item to be published, please make sure everything you have submitted is accurate – once published, it will be permanently available.
After clicking Submit for review, you will be prompted to double-check both the licence that you have assigned to the item and the terms of use. Once you have confirmed, the item will then be sent for review by SciLifeLab Data Repository’s institutional reviewers.
If you are submitting a brand new item, the reviewers are likely to send you an email detailing small changes that you should make in order to maximise the reusability of the item. Once you have made these changes, and confirmed this with the reviewer, the item can then be made public. If the reviewers do not receive a response within five weeks, then the item will be sent back to you. The status of the item in your account will then show as “declined”, rather than “under review”. This does not mean that the item has been rejected in any way. Rather, it reflects that the reviewers will not actively continue reviewing the item at this time. You are very welcome to send the item for review again whenever you are ready.
More information about the reviewing process can be found in the Reviewing Guidelines.

The submission workflow of the SciLifeLab Data Repository.
Step 6. Modify items
Edit items
You can go back and edit items after you have made them publicly available. To edit an item, click on the Edit button on the item in My content.
When editing a published item the item will be sent for a new review. When editing an embargoed record, amending or removing the embargo will also send the item back for review. To expedite this review, please send a message to figshare@scilifelab.se and explain which changes that were made to the item. When adding, removing or replacing files, remember to also update the manifest file to reflect the new state of the item.
Some changes may trigger a new version of the item. See here to find out which amendments will generate a new version. When a new version is generated, the previous versions will still be available. Each version will have its own DOI, where the version number is added as a suffix to the base DOI. See this item as an example. The base DOI will always point to the latest public version on the item.
Delete items
To delete unpublished items, click on the Delete item button in the metadata form to delete a private item.
Published items are considered to be published permanently and can only be deleted in special cases. If you wish to delete a published item, please contact Data Centre at figshare@scilifelab.se.
Frequently Asked Questions
An item is an entry to the repository that contains metadata and potentially also associated files. In other words, ‘item’ is used as an umbrella term for both metadata records and records with public, embargoed or linked files. An item can be included in groups, projects and/or collections. Each item is assigned a DOI (Digital Object Identifier), a permanent identifier.
When you type a grant number into the “Funding” field, the system will automatically search the Dimensions database for the grant. If the information is found, a hyperlink will be generated to the Dimensions page; bridging the connection between research outputs and the funder. Note that pasting in grant information or typing in the grant name may not trigger an automatic search of the Dimensions database, so if no dropdown menu appears, simply try typing the grant number in manually.
To add grant information that doesn’t appear in Dimensions, simply type the grant information into the field and don’t select anything from the drop-down menu. If your grant does not appear, but you still wish to add a hyperlink to the grant, you may manually add a link in the “Descriptions” field.
Yes, it is possible to add information about a publication to a published item. Further, if the publication(s) using the data in the item is published after the item, the item should be updated to include information about the publication in order to connect the data with the publication once it is published. Edits to a published item will trigger the review process again. However, this edit will not trigger a new version of the item. As with all edits to published items, please send a note to figshare@scilifelab.se summarising the changes made. This will expedite the review process, as the review can focus on the changes made.
Yes, the submitter can choose to apply an embargo when completing the metadata form before submitting the item for review for publication. Please consult the “Embargo and restricted publishing” section for more information.
Yes, the submitter can choose to reserve a DOI for the item when completing the metadata form before submitting the item for review. Please consult the “Manage identifiers” section for more information.
Yes, the submitter can choose to generate a private link for the item when completing the metadata form before submitting the item for review for publication. This private link can then, for example, be sent to reviewers who can view the item before the item is published.
Yes, it is possible to add a published item to a project. Only members of the project can add items into that project. Project members can do this by going into My Data and choosing the action Move to/from project for one or more items.
The base DOI is the DOI without a suffix added to it. For instance, this item has both a base DOI and a version specific DOI.
Example of a base DOI: 10.17044/scilifelab.14301317
Example of a version specific DOI: 10.17044/scilifelab.14301317.v2
Once an item is sent for review, a member of the review team will get back to the submitter with either comments, an approval or a decline of the item. In general, the review process takes around one week. Please note that during public holidays and summer this may be a bit longer.
1. Access your account
Log in to the SciLifeLab Data Repository.
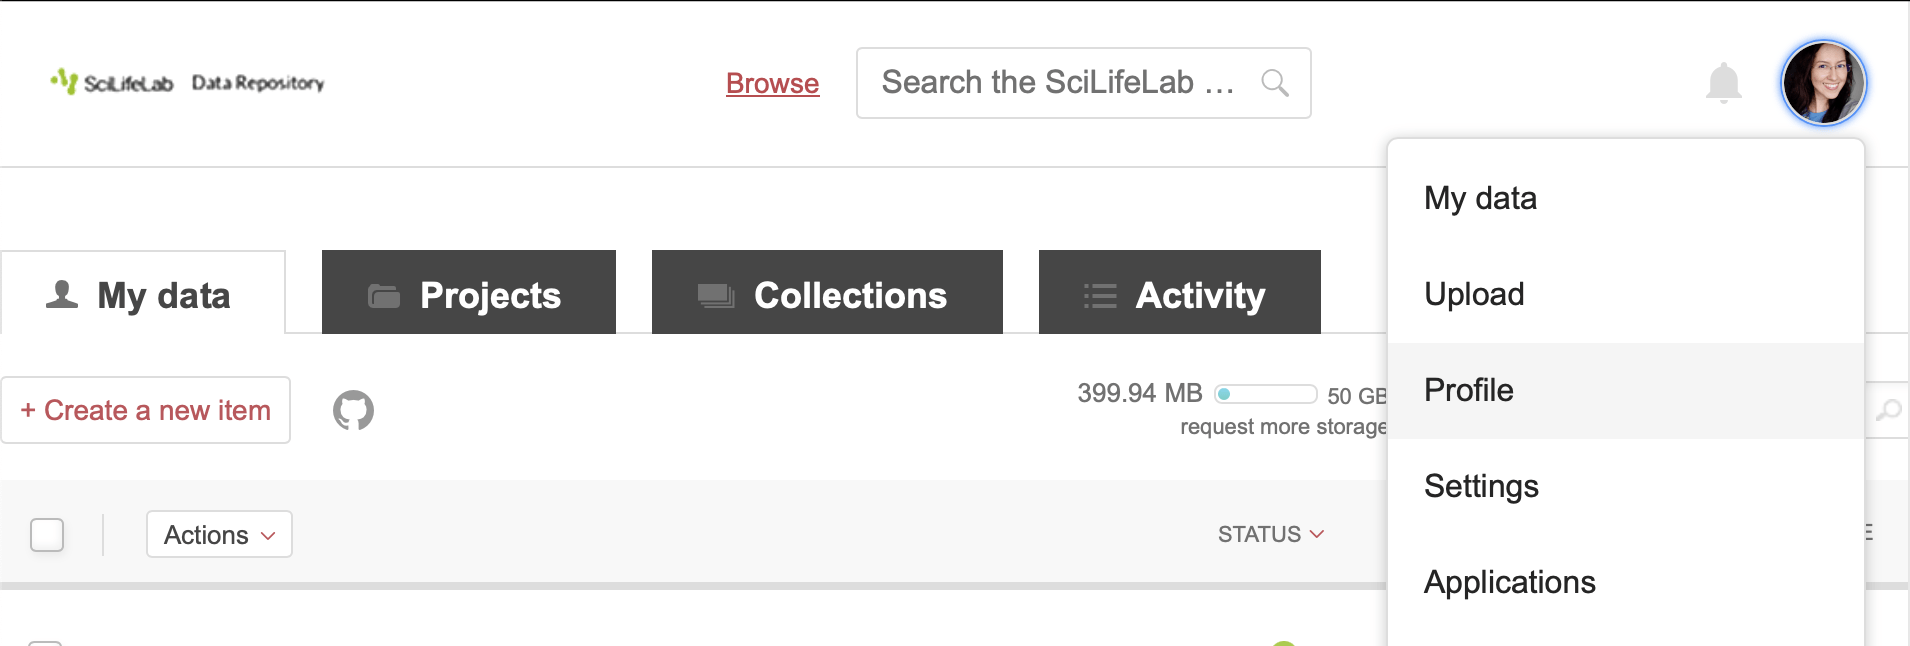
2. Open your profile
Click the profile badge (circle) on the top right corner of the page, and select Profile from the dropdown menu.
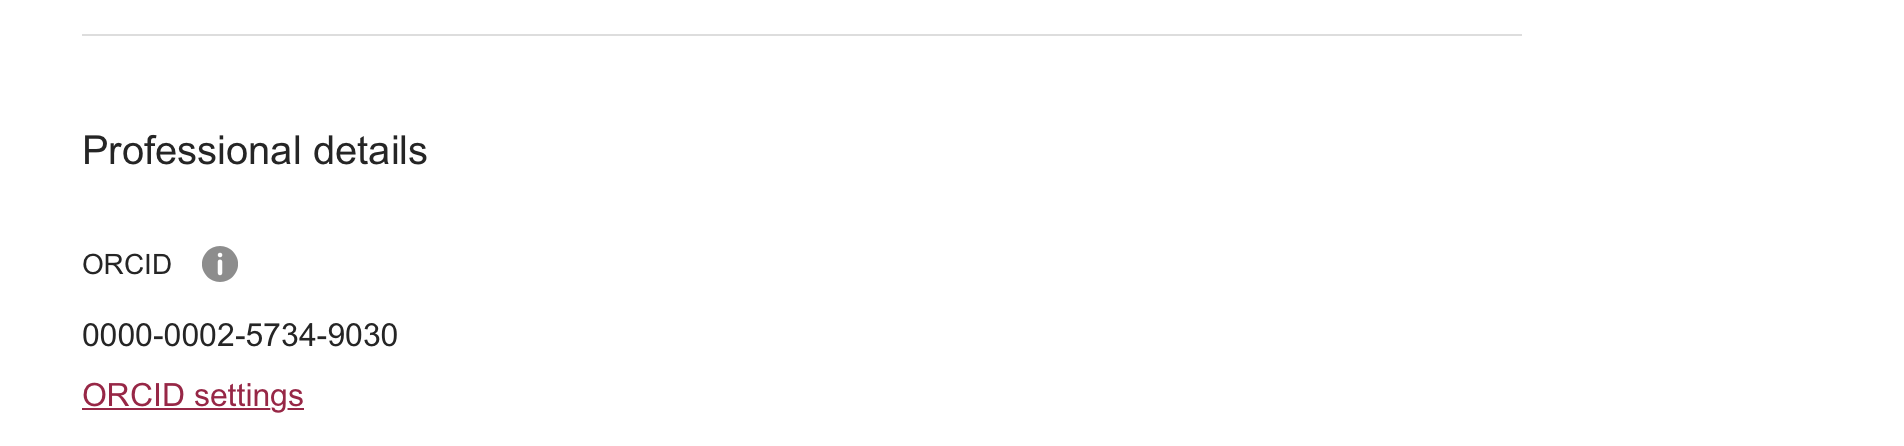
3. Add your ORCID number
In the Professional Details section of the Profile page, enter your ORCID number.
4. Save the changes made
Click the Save changes button in the bottom-right of the page.
1. Access your account
Log in to the SciLifeLab Data repository.
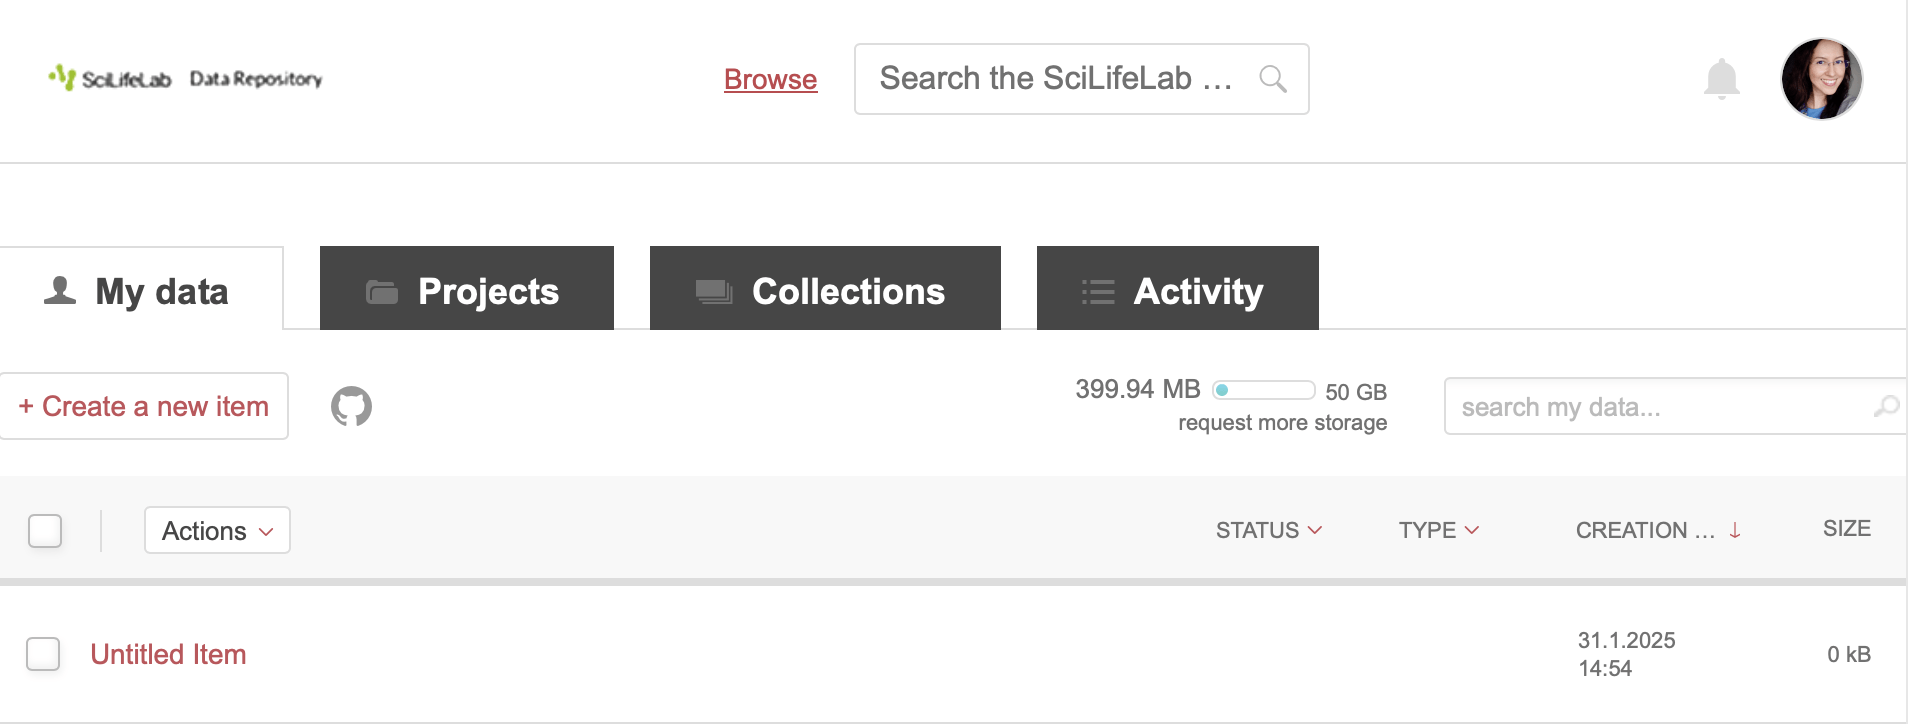
2. Select the item to edit
In the main dashboard, select the item whose group membership you want to change (e.g. “Untitled Item” in this case). A new window will open with the item’s information.
3. Change the group assignment
Scroll-down to the Group section and click the Change group button.
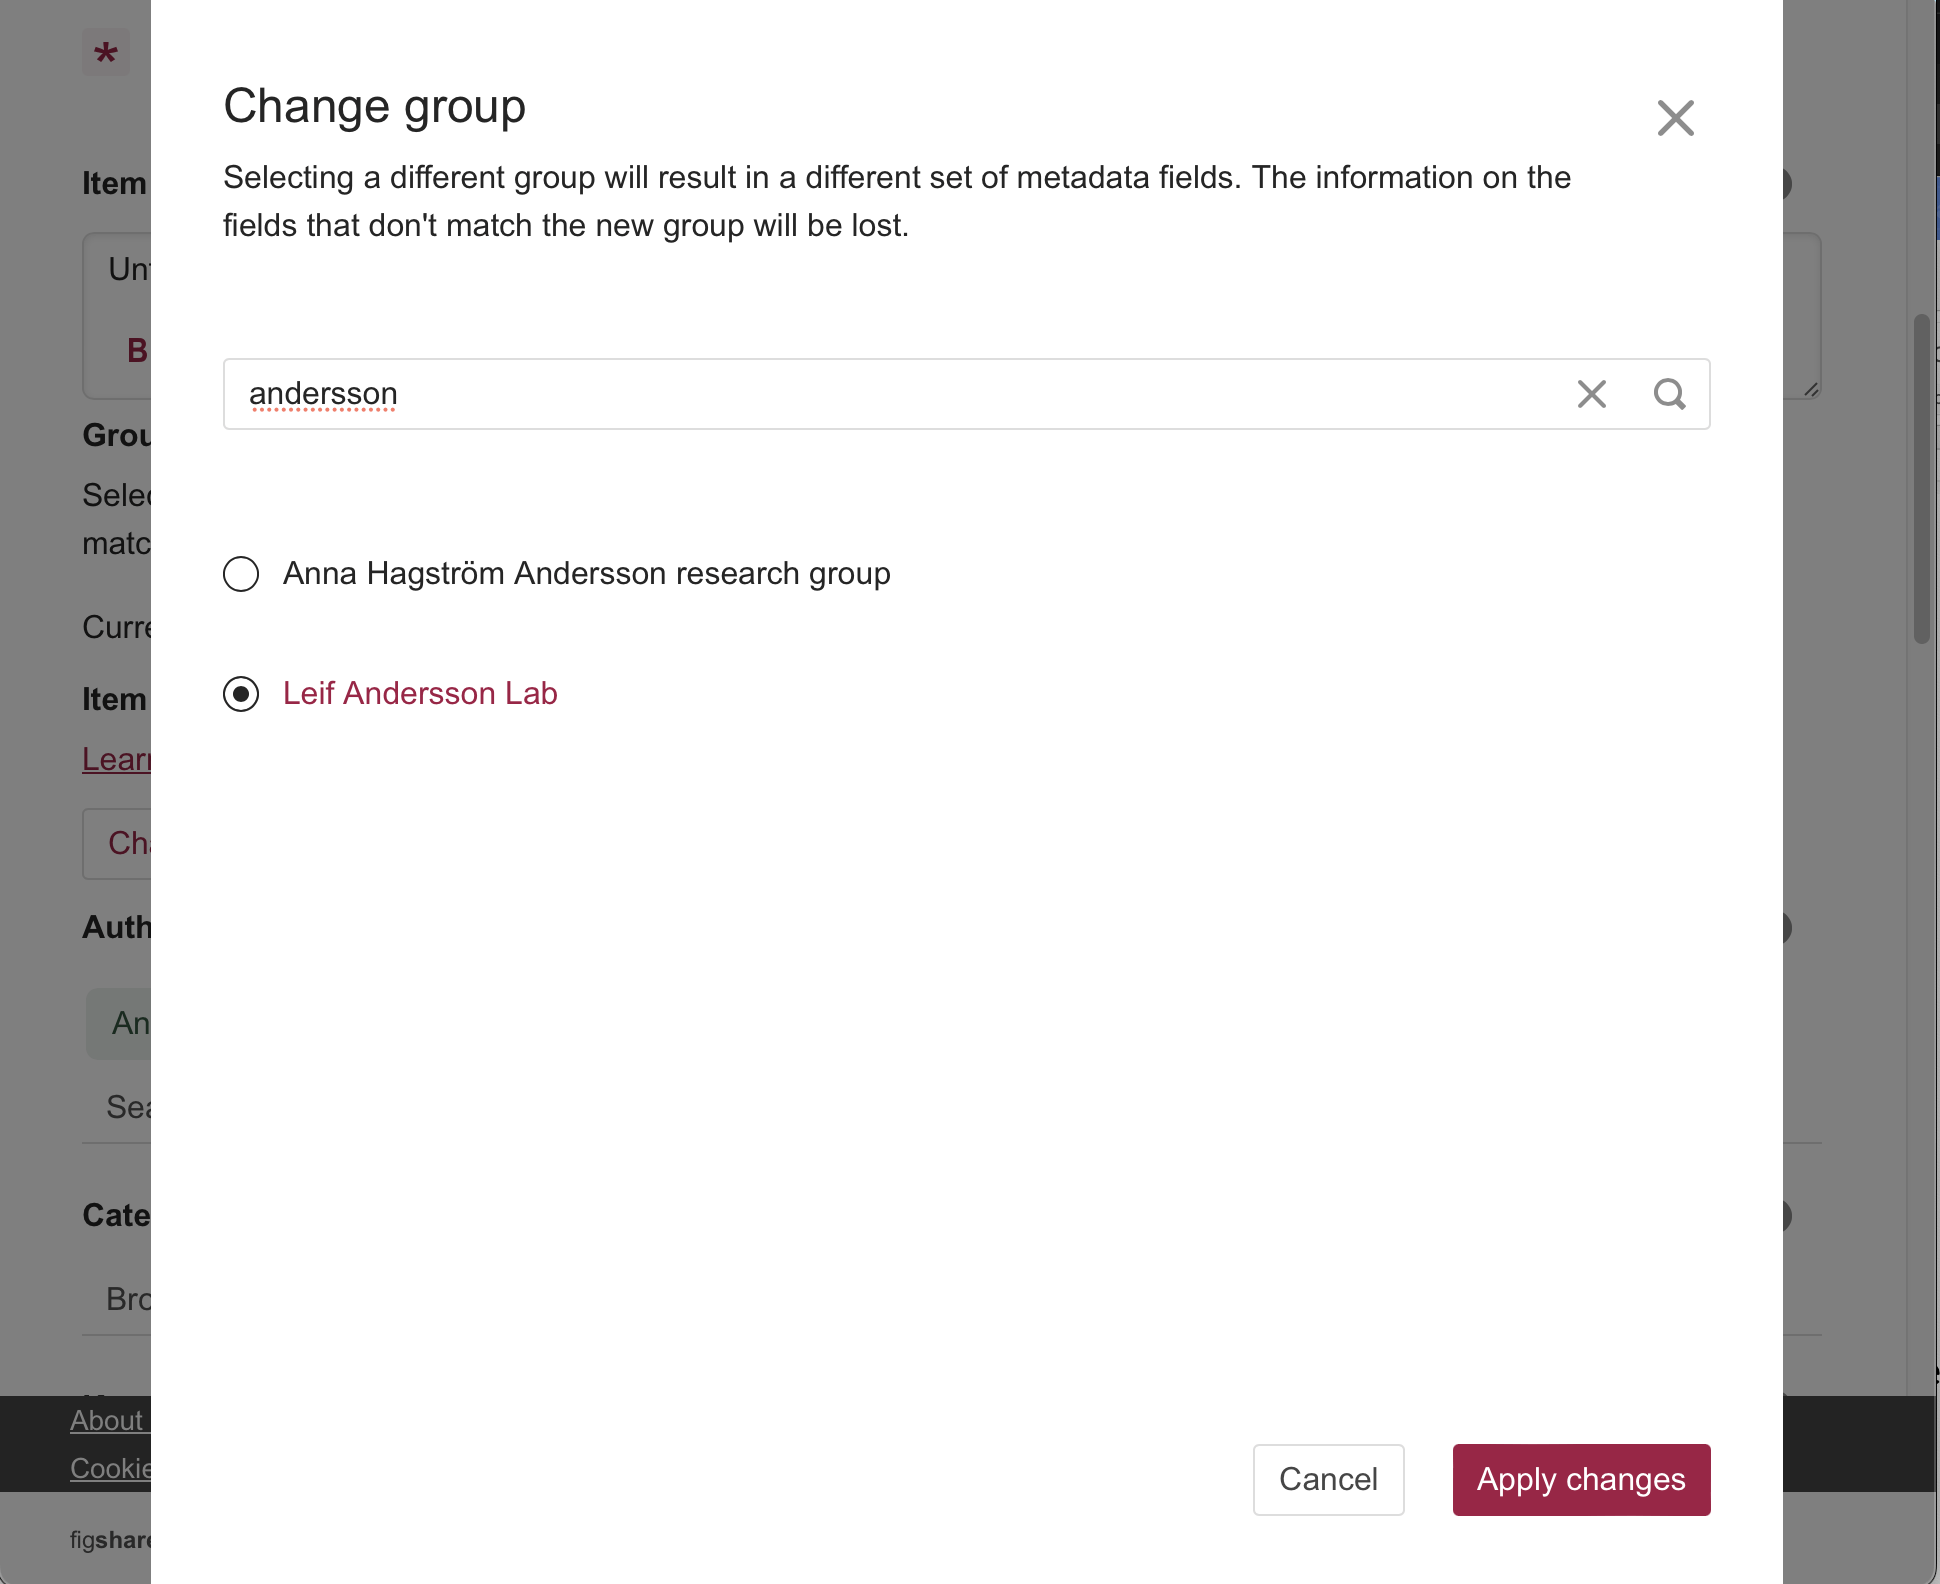
4. Assign a new group
In the search bar of the new window, type the name of the PI.
Select the desired group, and click the Apply changes button.
5. Save the changes made or resubmit for review
If the item has not been submitted for review, you can continue editing the metadata fields, and click Save changes when needed.
If the item was already sent for review, changing the group membership will trigger a new review (the Save changes button appears in grey). Don’t worry, this does not mean that the whole process will start over again, the current status of the item is saved. To complete the group membership change, click Submit for review.
For further questions, please contact figshare@scilifelab.se